|
Displaying 1 — 50 Description Price Add 71 1600 1800 2000 Body Frame Dimension Chart For BMW by Tru Way (711600Frame) $19.95 ✚ Add to Cart 77 BMW 320i Schematic Wiring Diagrams by BMW (77320iWiring) $29.95 ✚ Add to Cart 77 630CSI Electrical Troubleshooting Manual by BMW (77BMW630CSI) $49.95 ✚ Add to Cart 77 BMW K-Jetronic Fuel Injection Shop Service Repair Manual by Robert BOSCH (77BMWJetronic) $24.95 ✚ Add to Cart 78 BMW 5 Series 520 6 Cyl.
1994 brought many changes to BMW, most obviously by the introduction of the “R259″ series twins and the elimination of the old standby “Airhead” twins that had been BMW’s trademark for seven decades. While it is interesting to look at all the technologies introduced during the 1994 to 2004 time block, it is also exciting to look into what was going on as far as changes in BMW more esoteric than measurable.
In this author’s opinion there were unspoken changes in BMW’s mindset and philosophy. BMW had forged it’s reputation for long lasting, simple machines built to the highest standards and quality; aimed at a dwindling, older (OK, Jeff, more mature) market of enthusiastic but eccentric riders. They built motorcycles that were easy for the owners to maintain and modify to fit their specific wants. BMW had always built their bikes their way; often it seemed like they did so in spite of what the younger and upwardly mobile riders were looking for.
By 1994, the airhead was simply not a sellable motorcycle; the buying market was younger and wanted performance in line with what the Japanese products offered at much lower prices. The K 75/100 series that were so far ahead of their time in 1984 when they were introduced were also showing their age. No doubt, BMW knew this was coming many years before the new “Oil Head” was introduced. They knew that the riding community had reduced its mean age substantially.
The younger riders had money to spend on a bike that had to be BMW, yet had to be totally more modern both in performance and in perception than what BMW had been selling. Thus, the R259 was born.
The Birth of the R259 Twins The new BMW corporate mindset, if you will, was no longer concerned with selling motorcycles that would be handed down from one generation to the next, nor was BMW concerned about ease of maintenance with standard hand tools. Although the new bikes were still able to outlast the riders, the concern for building units to last a quarter-million miles was not so much in the forefront of the design.
The new models would have to be powerful, fast, handle better than anything on the road; they would need to offer a standard of technology that the Japanese would never build. They should be complex pieces of rolling art. Most obvious, though, was that they would build a product aimed at an entirely new market of riders who would likely not be interested in maintaining the bikes themselves or really understanding the nuances of design. The new customers BMW was looking for were serious riders who were more interested in the fun and excitement of riding than they were in savoring the history of the older designs Incoming search terms:.
The author of this manual has the conviction that the only way in which a meaningful and easy to follow text can be written is first to do the work himself, under conditions similar to those found in the average household. As a result, the hands seen in the photographs are those of the author. Even the machines are not new: examples that have covered a consider- able mileage were selected so that the conditions encountered would be typical of those found by the average owner.
Unless specially mentioned, and therefore considered essential, Honda service tools have not been used. There is invariably some alternative means of slackening or removing some vital component when service tools are not available and isk of damage has to be avoided at all costs.
Each of the six Chapters is divided into numbered Sections. Within the Sections are numbered paragraphs. In consequence, cross reference throughout this manual is both straightforward and logical. When a reference is made ‘See Section 5.12′ it means Section 5, paragraph 12 in the same Chapter. If another Chapter were meant, the text would read ‘See Chapter 2, Section 5.12′.
All photographs are captioned with a Section/paragraph number to which they refer and are always relevant to the Chapter text adjacent. Figure numbers (usually line illustrations) appear in numerical order, within a given Chapter. 1.1 therefore refers o the first figure in Chapter 1. Left-hand and right-hand descriptions of the machines and their component parts refer to the right and left of a given machine when the rider is seated normally. Motorcycle manufacturers continually make changes to specifications and recommendations, and these, when notified,mare incorporated into our manuals at the earliest opportunity. We take great pride in the accuracy of information given in this manual, but motorcycle manufacturers make alterations and design changes during the production run of a particular n motorcycle of which they do not inform us. No liability can be ccepted by the authors or publishers for loss, damage or injury caused by any errors in, or omissions from, the information give Incoming search terms:.
Always make a pre-ride inspection before you start the engine. You may prevent an accident or equipment damage. 2 Many accidents involve inexperienced riders. Most countries require a special riding test or license. Make sure you are qualified before you ride.
NEVER lend your motorcycle to an inexperienced rider. 3 Many car/motorcycle accidents happen because the car driver does not “ see the motorcyclist. Make yourself conspicuous to help avoid the accident that is not your fault:. Wear bright or reflective clothing. Don’t drive in another motorist’s “blind spot” 4 Obey all national, and local laws and regulations Excessive speed is a factor in many accidents.
Obey the speed limits am NEVER travel faster than conditions warrant. Signal before you make a turn or lane change.
Your size and manoeuvrability can surprise other motorists.5 Don’t let other motorists surprise you. Use extra caution at intersections, parking entrances and exits and driveways. 6 Keep both hands on the handlebars and both feet on the footrests while riding. A passenger should hold onto the motorcycle or the rider with both hands, and keep both feet on the passenger footrests. PROTECTIVE APPAREL 1 Most motorcycle accidents fatalities are due to head impact. ALWAYS wear a helmet.
You should also wear a face shield or goggles; boots, gloves, and protective clothing. A passenger needs the same protection.
The exhaust system becomes very hot during operation, and it remains hot after operation. Never touch any part of the hot exhaust system. Wear clothing that fully covers your legs. 3 Do not wear loose clothing which could catch on the control levers, footrests, or wheels. Adjustments -Take notice of the position of the compression adjustment 1!
-Count the amount of clicks by turning the adjustment screw clockwise till fully closed.Remove the rubber cap out of the axleclamp.Take notice of the position of the rebound adjustment 2! -Count the amount of clicks by turning the adjustment screw clockwise till fully closed.For the standard position see setting list.
Position of the compression and rebound adjustment -Set the rebound position 1, see KTM-Owners manual.Assemble the rubber cap.Set the compression position 2, see KTM-Owners manual. 1 2 2-22 Repair manual WP Fork “Closed Cartridge” Art.No.: 3.211.199-E Explanation of the spring preload -Total spring length without the spacers, see chapter inspection of the spring! -Spring length with spacers 1, see setting list.Spring with the spacers.The spring is assembled in the front fork leg.
NOTE: the distance of “B” is less then the length of “A”. A – B = Spring preload A 1 1 B 2-23 Air release screw -Place the motorcycle on the stand. NOTE: the front wheel must be lift of the floor! -Unscrew the air release screw 1 of the screw cap on top of the front fork and tighten after approx.
10 seconds the air release screw. Recommended periodic maintenance and inspection of the 4860 SX/SXS/SMR front fork 1 A 100 liter fuel consumption is equivalent to approx. 15 operating hours Clean dust scrapers (after 1 hour) Bleed fork legs regularly – after every cleaning Check the inner tubes on scratches / leakage Visual check of damaging of the outer-tubes / replace if necessary Complete service without disass. The closed cartridge of the fork Complete service including the closed cartridge of the front fork Dismounting the fork -Place your motorcycle on a stand.Notice the position of the front fork in the triple-clamps. NOTE: To remove the front fork.
Read your KTM Instruction Manual or Workshop Manual. 3-3 Mounting the fork -Clean the innerside of the triple-clamps with brake cleaner.Slide both fork legs into the triple-clamps. NOTE: Pay attention to the position of the fork legs.
Standard riding height! NOTE: The maximum riding height is the level of the second groove! -Tighten the middle bolt of the lower triple clamp to a torque of 17 Nm! -Tighten the first bolt of the lower triple clamp to a torque of 17 Nm! -Tighten the third bolt of the lower triple clamp to a torque of 17 Nm! Incoming search terms:.
GASOLINE IS HIGHLY FLAMMA- BLE: Always turn the engine off when refueling. Take care not to spill any gasoline on the engine or exhaust system when refueling. Never refuel while smoking or in the vicinity of an open flame. Never start the engine or let it run for any length of time in a closed area.
The exhaust fumes are poisonous and may cause loss of consciousness and death within a short time. Always operate your motorcycle in an area that has adequate ventilation. Always turn the engine off before leaving the motorcycle unattended and remove the key from the main switch. When parking the motorcycle, note the following: The engine and exhaust system may be hot, therefore, park the motorcycle in a place where pedestrians or children are not likely to touch these hot areas.
Do not park the motorcycle on a slope or soft ground, otherwise it may fall over. Do not park the motorcycle near a flammable source, (e.g., a kerosene heater, or near an open flame), otherwise it could catch fire.
When transporting the motorcycle in another vehicle, make sure that it is kept upright. If the motorcycle should lean over, gasoline may leak out of the fuel tank. If you should swallow any gasoline, inhale a lot of gasoline vapor, or allow gasoline to get into your eyes, see your doctor immediately. If any gasoline spills on your skin or clothing, immediately wash the affected area with soap and water and change your clothes. Step 1 — Locate ‘mold circle’ indentation on each side fairing panel (Pic 1). With panel mounted on bike, this indentation is center, at rear inside panel edge, and faces inside. Temporarily install bracket as shown in (Pic 2), align bottom bracket hole over indentation and mark for hole.
Remove brackets at this time. Step 2 — Remove fairing body side panels. Four screws per side required for removal, see owners manual. Drill a 3/8″ hole at mark. If harness kit has not been installed, do not re-install left side panel until finished unless you remove tank to install harness.
Removal of the tank is the best option to route harness from battery area to front of the bike. Step 3 — As required, re-install fairing body side panels. Do not re-install the top factory inner panel Torx Screw yet, as you will re-use this screw to secure the top light bracket mounting hole to the fairing panel.
Our Gas RV MPG – Fleetwood Bounder with Ford V10 - I have a 2016 Thor 32 foot Hurricane. Last summer we drove out west through Colorado, Utah, Grand Canyon, Grand Tetons, Yellowstone, etc. If you’re missing the owner’s manual for your Fleetwood RV, you can browse our archive of RV owners manuals and download a digital (PDF) replacement for free. 2016 Fleetwood Terry Dakota Owners Manual Fleetwood Terry 5th Wheel Manual| booklad.org fleetwood terry 5th wheel manual Unit A1 3/22/2016. Monticello (see Operating. Fleetwood terry dakota 24bh.
Step 4 — Using 10/32×1/2 screws and black shoulder washers from Hardware package, secure lights to PIAA Ezy-Mount® brackets (See Pics 3 & 4). Right side bracket is stamped ‘EZY-MOUNT’. See note below for Powersports lights. Due to close proximity of the light body to fairing side panel, access to the vertical adjustment screw on the panel side of the light will not be possible after installation. To prepare for this; before installing bracket/light assembly to panel, make sure this screw is tightened so that you can barely move the light body.
After bracket is installed, final vertical adjustment can be secured with the inside screw. Torque on this screw is adequate to hold vertical adjustment, and the screw that faces the panel will not come loose. NOTE: WHEN INSTALLING POWERSPORTS LIGHTS, YOU MUST INSERT THE SHOULDER ADAPTER WASHER INTO THE LIGHT FOOT, BEFORE INSERTING SCREW TO SECURE LIGHT FOOT TO BRACKET. THIS ADAPTER CENTERS LIGHT FOOT OVER PEMNUT (TIGHTEN THIS SCREW SECURELY). Step 5 — Insert well nut into previously drilled 3/8″ hole.
Place bracket assembly against fairing, aligning top hole with the top fairing mounting position; re-install the factory Torx screw at this location. Adjust as necessary and install the second supplied SS 10/32 x 5/8 Torx screw thru the lower bracket mounting hole to the well nut. With constant pressure on the screw, tighten securely. Constant pressure ensures that the rear expandable section of the well nut captures the back of the plastic inner panel as you tighten the screw. Future removal of fairing panels is now possible with light assembly installed (utilizing the bottom bracket mounting screw), thus re-alignment of lights is not required after normal maintenance.
Entering its next generation, BMW Motorrad Integral ABS is taking a quantum leap in the process of evolution, advancing from a stand-alone solution acting only on the brakes into a fully networked all-round system. Offering the new generation of Integral ABS, BMW Motorrad provides the foundation for additional dynamic riding control systems with a reduction in technical requirements and features. And following the customer’s wishes, this new generation also opens up the option in future for further-reaching rider assistance functions. The first step in this direction is BMW Motorrad ASC Automatic Stability Control available as of 2007. This system serving to control drive spin on a production motorcycles is being introduced as an optional extra on the touring models in the BMW K and Boxer Series.
Once again, therefore, BMW is acting as the pioneer in the introduction of advanced safety technologies on the motorcycle. This further enhances the leadership which BMW Motorrad has shown in the area of active safety for more than 15 years. Choosing the right development partner for both systems, BMW Motorrad obviously had to focus on that partner’s specific competence in control technology and the networking of functions within the vehicle. In recent years, major car suppliers have become aware of the technical challenges presented by the motorcycle with its specific riding dynamics and the growing potential for motorcycle control systems in the market.
The decisive point in preselection of the development partner was the willingness and ability to develop specialised solutions suitable for use on BMW motorcycles. So taking this into account, joint development of the new generation of ABS brake technology started together with Continental-Teves in early 2003. Integral ABS. BMW Motorrad’s new Integral ABS technology has been developed separately from the previous system and the entire layout of the system has been newly conceived from the ground up.
Capitalising on progress in technology in both hydraulics and electronics, the development engineers have succeeded in simplifying the architecture of the system while at the same time enhancing its functions to an even higher standard. The result is supreme stopping power and very short stopping distances even without electrical power assistance on the brakes. Vengeance Warrior. Vengeance Raider.
Vengeance Vertebreaker. Vengeance Striker. Vengeance Vendetta. Vengeance Vindicator Shifting Gears Starting off and changing gears requires coordination of the clutch and throttle and gearshift lever. If you don’t do things right, the amount of control you have over the bike is lessened. To start off, pull in the clutch, shift into first gear, roll on the throttle a little, and ease out the clutch.
You will become familiar with the friction zone (that’s where the clutch begins to take hold and move the bike), and you add a bit more throttle. You don’t want to stall the engine, nor do you want to over-rev it.
There’s a sweet spot in there; find it. Shift while traveling in a straight line. Shifting in a curve is not good practice, and something to be avoided. Become familiar with the sound of your engine, so you can tell when you should shift without looking at your instruments. When you downshift to a lower gear, you should (in one swift, smooth movement) be able to squeeze the clutch, rev the engine a little to let it catch the lower gear smoothly, and shift down. When you come to a stop in traffic, leave the bike in first gear with the clutch disengaged (just in case you want to accelerate out of there in a hurry). Who knows what may be coming up behind you.
Braking Don’t ever forget: The front brake on your motorcycle can supply as much as 70 percent or more of your stopping power. The single most important thing you can learn about braking is to use that front brake every single time you want to slow down. Always apply both the front and the rear brakes at the same time.
If necessary, apply them hard, but not so hard that you lock up either wheel. A locked wheel, as well as causing the bike to skid, results in downright inefficient braking. Turning When you are riding along the road, you lean a motorcycle into a turn.
Learning to lean is an essential part of riding a motorcycle. It is a normal function of the bike when you are changing its path of travel – and quite different from turning the steering wheel of your car. To get the motorcycle to lean in a normal turn, press the handlebar in the direction of the turn and maintain slight pressure on that handlebar to take you smoothly through that particular turn. In other words: press right to go right; press left to go left.
Your instincts to keep the motorcycle on a smooth path while keeping it from falling over usually take care of this without you even noticing it. (Demonstrate to yourself how a motorcycle moves by pressing a handlebar slightly while traveling in a straight line.
The motorcycle will move in the direction of the handlebar you pushed.). Fit the stand using the M8x18 screw to fasten it and the spring provided (photo 1 6). We suggest you to remove the stand during competitions as it could be dangerous and bruising. 18- Fit the gear lever lhoto 171. 19- Fill the fuel tank (See section 4.13). 20- Check the engine oil level (See section 4.3). INTRODUCTION Always ensure that the motorcycle has been efficiently serviced and check it over before riding it.
Take your motorcycle to an authorised POIJNI MOTOR1 dealer for all maior servicing and repair. Because of the manufacturer’s policy OF continuous development, and because of constant innovations in technology, your motorcycle may differ in some details from that described in the illustrations and text in this manual.
Original POLlNl MOTOR1 spare parts are always made from the same materials and in the same way as the parts originally fitted to your minicross motorcycle. Always insist on original POIJNI MOTOR1 spore parts. Their use ensures a longer life and improved efficiency for your motorcycle. STARTING THE ENGINE FOR THE FIRST TIME Always check over your motorcycle thoroughly before starting the engine. To start the engine for the first time, as instructed below. 1 – Turn the fuel tap located under the fuel tank to #ON” position (photo 18) Run your new motorcycle in as instructed How to ensure that the engine and transmission bed in correctly and to ensure continuous reliability in Future.
The first time yw ride your new motorcycle, ride for about two hours at low engine speeds to ensure that it runs in correctly. Also respect the following precautions. 2- Once the engine starts, leave it idle until it warms up to normal temperature. If you switch the engine off for a short time, wait for it to cool down completely before you re-start it.
– 3- During the running in period, always ride at constant 2- Before starting the engine put the gear in neutral position speeds. AVOID RAPID ACCELERATION. (photo 19, gear N). 4- Even when riding at low engine speeds, avoid extended A WARNING! IF the gear position is not neutral the bike could move when started. 3- If the engine is cold, lift the choke lever on the carburettor (photo 20).
Lower the starter lever again as won as the engine starts to warm up. 4- Leove the throttle closed. Pivot the kick-start lever out wards and push energetically downwards with your foot to start the engine. 5- Return the kick-start lever to its rest position.
Leave the engine idle for a few minutes to warm it up. Check that the engine stop button stops the engine effectively before yw begin riding the motorcycle. Difficult sections of road or Lck that could cause the engine to become very hot. 5- Once you have run in your motorcycle following all these instructions, take it to a Polini Motori dealer for its post- running-in service.
Apart from a change of spark plug and engine oil, this service also includes the disassembly Incoming search terms:. Additional On-Road Gear In addition to a helmet and eye protection, we also recommend: 0 Sturdy boots with non-slip soles to help protect your feet and ankles. 0 Leather gloves to keep your hands warm and help prevent blisters, cuts, burns and bruises. 0 A motorcycle riding suit or jacket for comfort as well as protection. Bright- coloured and reflective clothing can help make you more noticeable in traffic.

Be sure to avoid loose clothes that could get caught on any part of your motorcycle. 4 Additional Off-Road Gear On-road apparel may also be suitable for casual off-road riding. But if you plan on any serious off-road riding you will need more serious off-road gear.
In addition to your helmet and eye protection, we recommend off-road motorcycle boots and gloves, riding pants with knee and hip pads, a jersey with elbow pads, and a chest/ shoulder protector. This motorcycle has been designed as a rider-only motorcycle. It is not designed to carry a passenger. A passenger could interfere with your ability to move around to maintain your balance and control of the motorcycle. In addition, exceeding the weight limits or carrying an unbalanced load can seriously affect your motorcycle’s handling, braking, a11d stability. Adding accessories or making modifications that change this motorcycle’s design and performance can also make it unsafe. Also, the weight of any accessories will reduce the maximum load the motorcycle can carry.
The following pages give more specific information on loading, accessories and modifications. Loading How much weight you put on your motorcycle, and how you load it, are important to your safety. If you decide to carry cargo, you should be aware of the following information. Overloading or improper loading can cause a crash and you can be seriously hurt or killed.
Follow all load limits and other loading guidelines in this manual.
BMW R1200RT (2014 - 2016) Written from hands-on experience gained from the complete strip-down and rebuild of a BMW R1200RT, Haynes can help you understand, care for and repair your BMW R1200RT. We do it ourselves to help you do-it-yourself, and whatever your mechanical ability, the practical step-by-step explanations, linked to over 900 photos, will help you get the job done right. Regular servicing and maintenance of your BMW R1200RT can help maintain its resale value, save you money, and make it safer to ride.
Step-by-step maintenance and repairs guides for your vehicle in two formats.
Engine: Engine Type Flat Twin Cylinders 2 Engine Stroke 4-Stroke Cooling Liquid / Air Valves 8 Valves Per Cylinder 4 Valve Configuration DOHC Compression Ratio 12.5:1 Starter Electric Fuel Requirements Premium Fuel Type Gas Transmission: Transmission Type Manual Number Of Speeds 6 Primary Drive (Rear Wheel) Shaft Wheels & Tires: Front Tire (Full Spec) 120/70 ZR17 Rear Tire (Full Spec) 180/55 ZR17 Brakes: Front Brake Type Dual Hydraulic Disc Rear Brake Type Hydraulic Disc Technical Specifications: Wheelbase (in/mm) 58.5 / 1485 Fuel Capacity (gal/l) 6.6 / 25 Motorcycle Insurance. I do not t pretend to be the best bike rider although I have ridden the Blue Ridge and the Tail four times on a Yamaha Road Star, HD UltraGlide and my last bike a Road Glide Bar far my favourite. In August I traded on a 2017 R1200 RT. What a change. The bike is amazing. Literally I would compare rid. Ing a Harley to a tractor.
This bike handles like a dream. I have more confidence in my riding ability than ever.
No more struggling with the HD weight. Braking and acceleration is amazing. Maybe I am not as cool as I used to be on my RoadGlide but riding this bike is FUN. Seriously I wish I could have both but I cannnot wait to ride the Tail on the BMW.
. Service manual. Welcome Guest! If you are already a member of the BMW MOA, please log in to the forum in the upper right hand corner of this page.
Bmw R1200rt 2017 For Sale
Check 'Remember Me?' If you wish to stay logged in. We hope you enjoy the excellent technical knowledge, event information and discussions that the BMWMOA forum provides. Why not take the time to join the club, so you can enjoy posting on the forum, the club magazine, and all of the and the BMWMOA offers?Want to read the MOA monthly magazine for free? Take a 3-month test ride of the magazine; check for details. If this is your first visit, be sure to check out the by clicking the link above. You will need to join the MOA before you can post: click this to proceed.
To start viewing messages, select the forum that you want to visit from the selection below. Some content will be hidden from you. If you want to view all content, you must register for the forum if you are not a member, or if a member, you must be logged in. Has anyone had any luck buying a service manual for a 2017 RT from BMW?
When I bought my RT I had the service manual included in the sale. That was February 2017 and the manual is still not available from BMW.
The 2018 bikes are arriving at dealers now. I have 31,000 miles on this RT now and sooner or later I am going to need that manual. I have written BMWNA customer service and they do reply, but it is all lip service not actual service.
Ron As mentioned, I think it's on disc. Haynes is still at 2016- There is always a lag time, even more if a purchase of say an '18 in '17. With 31K on the bike already, your doing great OM. I purchased a Haynes BMW '13 to '16 Liquid-cooled Twins service manual. Unfortunately, many pages are printer so lightly I can not make them out.
Have been trying to get Haynes to respond to me on getting a replacement. Has anyone else had this situation? I have the same manual. It is a step backwards in printing quality from the other Haynes manuals I have.
Cheap pulpy paper, poor printing quality and a soft rather than hard cover. I have not discovered any illegible pages, but disappointing none the less. I purchased a Haynes BMW '13 to '16 Liquid-cooled Twins service manual. Unfortunately, many pages are printer so lightly I can not make them out.
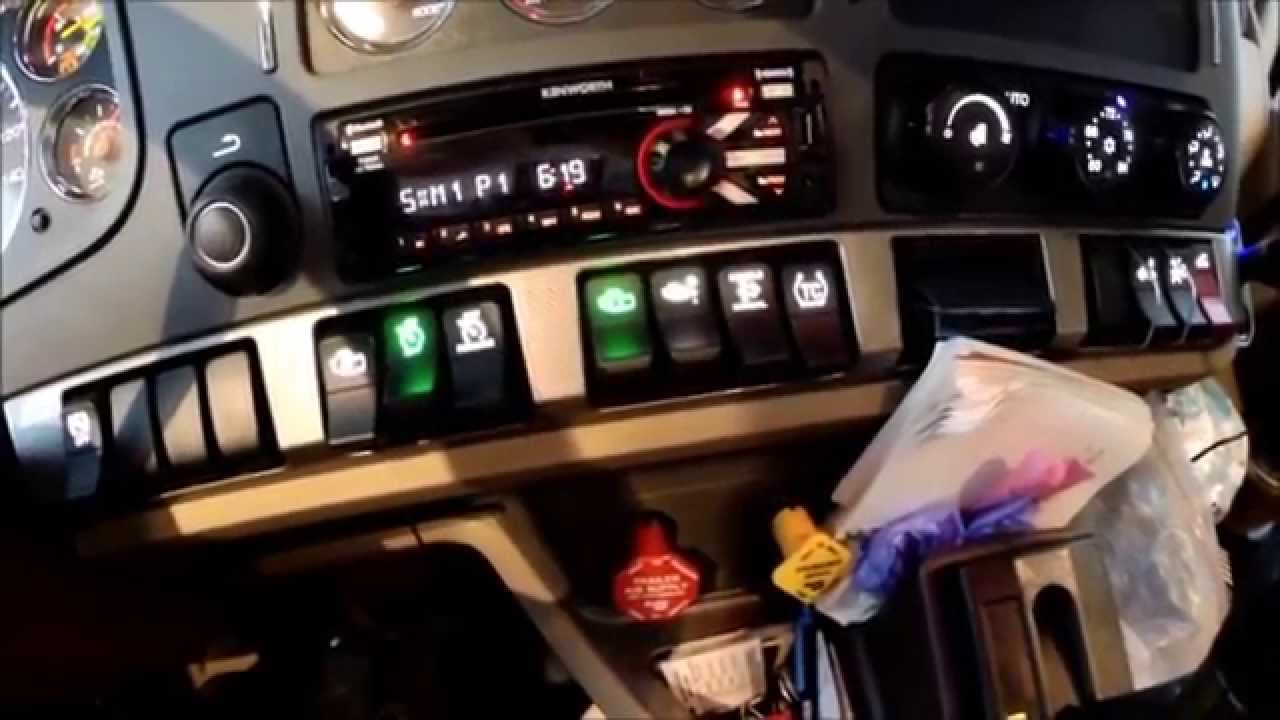
The line of production of the corporation Kenworth consists of six types of hood type eighth class. As a rule, these trucks are equipped with a reinforced suspension, a more powerful cleaning and air conditioning system, but the interior trim is more simple than in cars designed for American users.
Have been trying to get Haynes to respond to me on getting a replacement. Has anyone else had this situation? Haynes definitely had a bad batch with poor print quality. I purchased a copy 3 weeks ago from Amazon and the quality is fine with no bad pages. I specifically ordered from Amazon so I could easily return it if there were bad pages.
The paper (.00425') and printing appears to be the same as the Anonymous book - adequate for the purpose but not like the Clymers and Haynes of yesteryear. I'm happy with my copy.
So far I'm happy with the content too. Time will tell.
Comments are closed.
|
AuthorWrite something about yourself. No need to be fancy, just an overview. ArchivesCategories |
 RSS Feed
